Thursday, September 13, 2012

Tent Time

Such a peaceful day, we are blessed.
 What You'll Need:
Double Ended Clip Chain
Extra Fabric/Blanket
Items to secure Fabric into the grass
(We used our slip-n-slide stakes)
 
 
So...we went camping for the first time. Now, that's all my son wants to do, camp, hike, go on an "adventure".
While my son was at school, my daughter and I surprised him with our own backyard tent.
Yes, we could set up our 2 person real tent, but the imagination when building our tent was incredible.


Story Time:
Joe's favorite part of camping
or bonfires are the stories.
 
We secured our old dog vinyl yard chain to 2 trees.
Draped a roll of extra fabric (donated by my uncle) over the chain.
Cut 6 holes on each end of the tent.
Secured the tent into the grass.
Rescued a few outdoor cushions for seating and sleeping.


Phone Tag with the roll
from the fabric.
I saw so many adorable tent from Pinterest, but could not find the time to create them. This was super easy, free and just made three days incredible. We used our outdoor chair cushions as a reading nook and head pillows for naps. We found extra sheer fabric and made a door way. And I cannot forget about the dino house we made...we are missing a few T-Rex's/

Thursday, August 30, 2012

Floored

 What You'll Need:
Roll of Paper
Markers
Tape
Tape Measure

 We have a doorway in our house which the kids measure their growth spurts, and mark their progress.
It's actually in a perfect spot by the dinner table, and we often encourage them to eat their healthy foods to "grow" and not "shrink".

This day was no different with excitement of seeing how fast we grow!


While kids were napping, I rolled out Kraft paper and taped to the floor. I also placed each child's paper AWAY from each other, to prevent any artwork from making its way onto someones paper.


After we traced the outline of each model, we took our measuring tape to learn how to measure height. It was almost a contest! My 4-1/2 yr old was 3'-7" and his little sister came in at a close 3'-5"!

I marked each foot we measured and they really got into learning how to measure! Even helped each other!


We then discussed different items that are on our faces, what we wear in the summer, and always where our hearts are! They love adding their hearts!


Joe went winter on us and we added ice skates and ice to his portrait. Sara was very realistic and asked for help to draw her exact Hello Kitty shorts and shirt!


Ideas:
Practice proportional drawing with your children.
Understanding the proportions of the face enable students to study early learning of space.
Discuss anatomy with scientific names, i.e. femur, heart valves, etc. to encourage science.


Tuesday, August 28, 2012

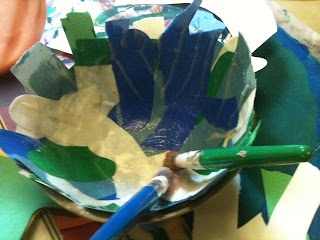
Green Bowls

What You'll Need:
Homemade Glue
Flour
Water
Recycled Paper
Vaseline/Petroleum Jelly
Bowl
 
 
Create your own glue:
1 part flour : 3 parts water
Heat over low/medium heat.
Stir constantly until all bubbles, clumps are smoothed.


Find recycled paper, old construction paper bits, leftover newspaper, etc.
Using a plastic or metal bowl, lightly line bowl with Vaseline or petroleum jelly to prevent paper from sticking.
Add pieces of paper and apply thin layer of homemade paste to paper.
Continue to add paper and glue until at least 7 layers of paper are complete.

Allow to fully dry.

Slowly remove from plastic shaped bowl.

You have created a recycled bowl to use as is, or make it more personal and paint it!
 
Inspired by yet another public library book: "Make It" by Jane Bull

Monday, August 27, 2012

Olympic Chalk

 What You'll Need:
2012 Olympics
Chalk


"Mom, are we the red team or the white team?" Joe asked while watching Women's Volleyball.
Then he began saying "Let's go white team!"


I was a little shocked how into the Olympics my 3 & 4 year old did.

Non the less, when moments like this arise and you can build upon their memories and show immediate connections in time, they be able to retain and remember significant moments.
These memory boosters may be applied later down the road, such as in a World History class, but it also allows children to begin to build on their retaining memory. We tend to connect an event with a time period. If we can create these connections, children will be able to utilize their saved "storage space" (aka their brains). 


More Cheerio Fun

 What You'll Need:
Cheerios
(we used Trader Joe's Fruit O's)
PlayDoh
Speghetti Noodles


 As if making a clump of playdoh isn't fun enough, but then you add edible fun!

In our house, we're learning colors at one age, and patterns at the other. This was a great project to apply both.
 
Create a base with playdoh.
Stick dried speghetti or straws in the playdoh.
 
Ask children to match the colors on each stick.
Or, show children a pattern, and ask them to recreate it.
 
As always, allow a few "O's" to disappear in the process!
 
Visual Arts Early Elementary Standards
25.B.1 
Identify similarities in and among the arts (e.g., pattern, sequence and mood).


Tuesday, August 21, 2012

Bring It To Light

 What You'll Need:
Recycled Items
Fishing Wire
3M Removable Hooks
Hanging Light Buld Kit
 This is probably still one of my favorite projects I did with my Interior Design students in High School, but can be applied at any age.

Great to introduce recyclable artwork and artists, even better to apply techniques to real life uses.

After studying objects and material and necessary items for projects to be successful, students were able to create their lighted chandeliers.
Students of any age are interested in shedding light on how to creatively help our earth and quality of living, we just have to include their ideas!

The site that inspired these creations and much of the recycled artwork throughout ideas is:

Sparkle

What You'll Need:
Sparklers
A LOT of ADULT Supervision
Camera (manual mode)


Although I recommend this project for much older children with adults at all times, this is a wonderful playful way for children to "play" with light. Motion is such a wonderful transition to learn and making motion art is incredible for all senses.


A great way to introduce shutter speed and exposure for photo students.
A great way to entertain ideas of 4th of July for younger students.

Always a fun project to create names, shapes, or have fun with.


An interesting site on more information for long exposures:Learn My Shot

Tuesday, July 10, 2012

Shredded


What You'll Need:
Shredded Paper
Flour
Water
Recycled Boxes

Mix 1 Cup of Flour with 1 Cup of Water
Bring to a boil; add 2 more Cups of Water
Constantly stir until mixture is smooth
Pour into a glass bowl and allow to cool
You just made natures paste!


  1. Using your shredded junk mail you can create a pretty cool looking picture frame for pictures or artwork.
  2. Measure and Cut 2" frames from recycled boxes.
  3. Cut the center out.
  4. Brush on the paste and line shredded paper around the frame.
  5. Once paper is in place to your liking, brush another coat on top of the frame.
  6. Allow to completely dry.
  7. Using double sided tape or glue to adhere your images to the frame.

Great Uses:
Recycling Artwork


Hangin By A Wire

 What You'll Need:
Recycled Wire Hangers
Wire Cutters
Felt or Foam
Glue
Scissors
Yarn

  1. Cut 5 different shapes from the hangers.
  2. Bend in the center.
  3. Create or use matching shapes on each end of the hangers.
  4. Glue to the ends and allow to completely dry.
  5. Cut about 2-3" of yarn
  6. Tie each hanger center to the next.
  7. Tie the final or top hanger piece to the cute hook.

If you haven't yet gotten on the Kid Made Modern boat, I'd say check it out.
I came across this book in the library before it hit shelves at Target and fell in love with it.
As an Art Teacher, I want my children to be familiar with artists, styles, and open to create.
This book introduces an artist, shows examples of artwork, then allows children and adults to create within the artist style and genre. Awesome!

Great Uses:
Artist Introduction: You may think children are too young to hear words such as Picaso or Jackson Pollock, but the more they hear and are exposed to art, the more creative children we produce.
More businesses are suggesting corporate managers go back for their MFA to learn how to think outside the box and become creative. No society has survived without art, artists and creative thinking.

Garden Growers


 What You'll Need:
Plant Starters or Egg Carton
Soil
Seeds
Watering Can/or recycled bottle

Ability to with stand getting dirty
REAL dirty!
What a better way to get your kids on board with helping out our planet, than by teaching them how to care for it. We plant vegetables and herbs every year, and both kids love watching the seeds grow, to picking out safe to ear herbs.
Fun Herbs We Like to Eat:
Stevia, Melon Sage, Pineapple Sage, Chives (but wow, the breathe!)


Watering Cans were a HUGE hit this year.
We not only use them to do, just what they are for, water.
But, we also spent a good 30 minute personalizing them with stickers, our name and colors!

Additional Notes:
We originally planted 1 single seed in a glass jar with paper towel. Within days our seeds split and began to sprout. Every morning they would yell and run to their seed and were so excited to see the progress it made.
C'mon now, that's just plain cute!

From Their Perspective

What You'll Need:
Digital Camera
Printer

Ever wonder just how new and exciting some places can be for you and your kids, although there is nothing NEW nor all that overly exciting at the same places you visit.

Get an idea for how fun these places can be from the perspective of your kids point of view.

A cold, windy day at the Wheaton Cosley Zoo turned into a 2 hour extravaganza of photo shoots by a 2 and 4 year old artist.

Title: Close Up                     Photographer: Joey-Age 4


Title: "Mama Sheep"         Photographer: Sara-Age 2


Great Uses:
Explain how people use cameras: show examples in books and newspapers
Create your own album of outings, our kids absolutely love any picture keepsakes they take.

Framed

What You'll Need:
Boxes
Paint
Pictures
Ribbon
Double Sided Tape/or Glue
So many pictures and memories, but so little time to change out the frames.
A fun way to include your little ones to join in on the memories and recalling are to create your own frames.

Great Uses:
Review colors:
We combined primary color paints to create secondary colors.
Recognition:
Create frames for each family member


After the frames dry, add your picture with double sided tape, and attach ribbon for an easy way to hang. We bought 3M removable hooks to hang in our basement so the kids can see their pictures and now their artwork!

Wednesday, May 2, 2012

Bubbles N Butterflies


What You'll Need:
Cardboard
Bubbles
Food Coloring
Yarn
Hole Puncher
Work outdoors or Cover Work Area

Bubbles and color were a great combo not just done by Crayola. During spring season this combo is a great way to incorporate color recognition, as well as make fun wings to fly around the house.

Combine 1-2 drops of food coloring (check stain and contact safety) with bubbles, or make your own!

If the weather allows, head outside,
or cover the heck out of your work area!

We created butterflies for Spring, but possibilities are endless.

Using old folders or cutting out a template onto cardboard create your wings and allow children to cover their wings with their bubble colors.

Allow time to dry, and don't over bubble the area! Or you'll have saggy wings, and NO ONE likes saggy wings.

Punch four holes, measure children's wingspan and tie ribbon or yarn for wings, and take off time!
How can bubbles and food coloring not be a great idea ; )

Sunday, April 29, 2012

Fro Yo

What You'll Need:
Yogurt
Cookie Sheet
Wax Paper
Spoon

Delicious Ideas! Pinterest sparked my snack time ideas. These little frozen yogurt chips are ALWAYS a crowd pleaser.

Layout out wax paper on a cookie sheet and let little hands dab yogurt on. We've made swirls, all sizes, and all shapes.

Relocate into the freezer overnight, and peel off and enjoy.

Tip: I am usually able to place these into a small cup for snack time, and they are gone before melting worries can even start!

Catching The Sun

What You'll Need:
Sunlight
Shadow Makers
A day at the park, or in your backyard can have endless possibilities between the relationship with your kids and the sun.

Learning about the direction the sun rises, sets and how it's actually a star is fascinating to little minds.

But, best of all, it's a natural entertainer as kids move.


Great Ideas:
  • Grab some chalk and trace outlines of your shadow makers and let them decorate themselves.
  • Discuss the difference of positive and negative space.
  • Draw LINE around the shadows and create PATTERNS inside each shadow with SYMBOLS to represent themselves.


Standards:
25.A.1d  Visual Arts: Identify the elements of line, shape, space, color and texture; the principles of repetition and pattern; and the expressive qualities of mood, emotion and pictorial representation.

S'more Letters Please

What You'll Need:
Toothpicks
Marshmallows
Lots of Letters in Mind 

Each week we sound out, learn and practice a new letter. Each time we embark on our letter adventure, I try to create a new kinesthetic approach to create the letters.
This week, being close to Easter, we included the marshmallow approach.
Food for thought is always a great combo to create with and motivate with.
After each letter we made, we were able to enjoy a few mallows.
Although a few disappeared along the way.

What can this be used for:
Create multimodal methods to learn basic letter forms.
Use basic elements of art to create visual representation of letter forms.


Standards:
Visual Arts
25.B.2  Understand how elements and prin­ciples combine within an art form to express ideas.


Tuesday, March 13, 2012

On Your Marks, Get Set...

What You'll Need:
Painters Tape/Or Similar
Vehicle Toys
Imagination

I'll admit, I saw this idea on pinterest and fell in love with it.
During nap time I love setting up little surprises like this for the kids,
they are so anxious to test drive the track!

We kept this up for 3 days straight because they wound uo moving tunnels, garages, hideouts for their cars and created a play helicpoter landing.

This would be great for younger Pre K students to learn basic directional procedures (left_right)
As well great for students to learn about cities.

Mr. Sandman

What You'll Need:
Sand
Glue
Baking Sheets


We do this project about once a week.

A professor in college taught us that when you mix two senses together in teaching early education characters or numbers children are more likely to remember them.

I used her philosophy and began teaching my children letter recognition using sand.
They were able to practice their letters, and actually wanted to, becaue they love the texture.


We also make designs and practice our letters with glue.
It's easy to clean up and mixing colored sand is key!

Check out more ideas to teach and learn letters at the Pre K level:

Sunday, March 4, 2012

Valentine's Photo Shoot

HAPPY VALENTINE'S DAY

What you'll need:
Hand Made Letters
Crazy Kids (preferably ready for bed)
A photo editing software to put it all together
...Oh, and a lot of time to just fall over and laugh!
The actual shoot was more fun, we went from being fully dressed for bed, to having to take a bath because a marker got loose and drawing on our belly seemed like a great idea! When this happens parents...you go with it!
The kids loved giving this to daddy as a Valentine's Day Gift.

Rethink Space

Here we go, testing out my retired painting skills, mixed with nap time, and left over paint from house projects.

I have grand ideas for this space and looking to make it more 2D/flat whimsical.

Some inspirations
  1. Little owls/trees from a print at Hobby Lobby 
  2. A wall clock I found on Etsy
  3. Night & Day
  4. And a special request for an alligator and shark from my son. My daughter just said, "paint" back to me as I asked her...