Thursday, August 30, 2012

Floored

 What You'll Need:
Roll of Paper
Markers
Tape
Tape Measure

 We have a doorway in our house which the kids measure their growth spurts, and mark their progress.
It's actually in a perfect spot by the dinner table, and we often encourage them to eat their healthy foods to "grow" and not "shrink".

This day was no different with excitement of seeing how fast we grow!


While kids were napping, I rolled out Kraft paper and taped to the floor. I also placed each child's paper AWAY from each other, to prevent any artwork from making its way onto someones paper.


After we traced the outline of each model, we took our measuring tape to learn how to measure height. It was almost a contest! My 4-1/2 yr old was 3'-7" and his little sister came in at a close 3'-5"!

I marked each foot we measured and they really got into learning how to measure! Even helped each other!


We then discussed different items that are on our faces, what we wear in the summer, and always where our hearts are! They love adding their hearts!


Joe went winter on us and we added ice skates and ice to his portrait. Sara was very realistic and asked for help to draw her exact Hello Kitty shorts and shirt!


Ideas:
Practice proportional drawing with your children.
Understanding the proportions of the face enable students to study early learning of space.
Discuss anatomy with scientific names, i.e. femur, heart valves, etc. to encourage science.


Tuesday, August 28, 2012

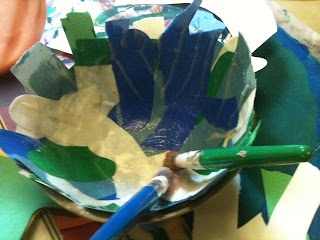
Green Bowls

What You'll Need:
Homemade Glue
Flour
Water
Recycled Paper
Vaseline/Petroleum Jelly
Bowl
 
 
Create your own glue:
1 part flour : 3 parts water
Heat over low/medium heat.
Stir constantly until all bubbles, clumps are smoothed.


Find recycled paper, old construction paper bits, leftover newspaper, etc.
Using a plastic or metal bowl, lightly line bowl with Vaseline or petroleum jelly to prevent paper from sticking.
Add pieces of paper and apply thin layer of homemade paste to paper.
Continue to add paper and glue until at least 7 layers of paper are complete.

Allow to fully dry.

Slowly remove from plastic shaped bowl.

You have created a recycled bowl to use as is, or make it more personal and paint it!
 
Inspired by yet another public library book: "Make It" by Jane Bull

Monday, August 27, 2012

Olympic Chalk

 What You'll Need:
2012 Olympics
Chalk


"Mom, are we the red team or the white team?" Joe asked while watching Women's Volleyball.
Then he began saying "Let's go white team!"


I was a little shocked how into the Olympics my 3 & 4 year old did.

Non the less, when moments like this arise and you can build upon their memories and show immediate connections in time, they be able to retain and remember significant moments.
These memory boosters may be applied later down the road, such as in a World History class, but it also allows children to begin to build on their retaining memory. We tend to connect an event with a time period. If we can create these connections, children will be able to utilize their saved "storage space" (aka their brains). 


More Cheerio Fun

 What You'll Need:
Cheerios
(we used Trader Joe's Fruit O's)
PlayDoh
Speghetti Noodles


 As if making a clump of playdoh isn't fun enough, but then you add edible fun!

In our house, we're learning colors at one age, and patterns at the other. This was a great project to apply both.
 
Create a base with playdoh.
Stick dried speghetti or straws in the playdoh.
 
Ask children to match the colors on each stick.
Or, show children a pattern, and ask them to recreate it.
 
As always, allow a few "O's" to disappear in the process!
 
Visual Arts Early Elementary Standards
25.B.1 
Identify similarities in and among the arts (e.g., pattern, sequence and mood).


Tuesday, August 21, 2012

Bring It To Light

 What You'll Need:
Recycled Items
Fishing Wire
3M Removable Hooks
Hanging Light Buld Kit
 This is probably still one of my favorite projects I did with my Interior Design students in High School, but can be applied at any age.

Great to introduce recyclable artwork and artists, even better to apply techniques to real life uses.

After studying objects and material and necessary items for projects to be successful, students were able to create their lighted chandeliers.
Students of any age are interested in shedding light on how to creatively help our earth and quality of living, we just have to include their ideas!

The site that inspired these creations and much of the recycled artwork throughout ideas is:

Sparkle

What You'll Need:
Sparklers
A LOT of ADULT Supervision
Camera (manual mode)


Although I recommend this project for much older children with adults at all times, this is a wonderful playful way for children to "play" with light. Motion is such a wonderful transition to learn and making motion art is incredible for all senses.


A great way to introduce shutter speed and exposure for photo students.
A great way to entertain ideas of 4th of July for younger students.

Always a fun project to create names, shapes, or have fun with.


An interesting site on more information for long exposures:Learn My Shot